There are six recessed lights and is pre-wired for a ceiling fan and light kit.
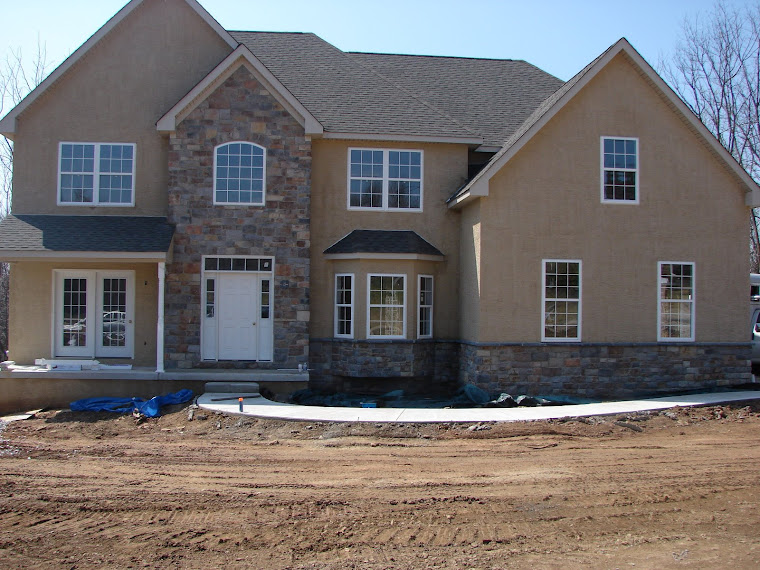
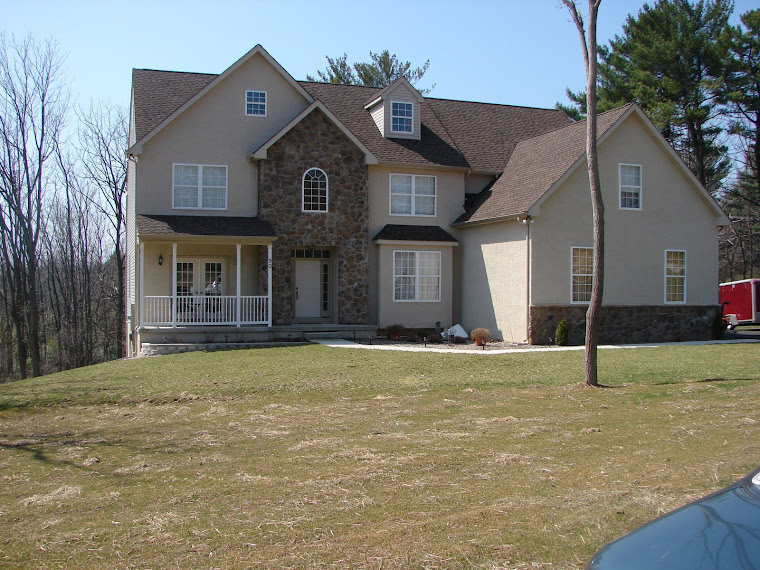
We can provide you with many of our own house designs or accommodate your ideas into our designs. You can always bring your own plan and we can custom build from any plan. Shop online for house plans.
Houseplans.com® is the largest online collection of house plans, offering over 27,000 floor plan options. Search by home design features, explore our house plan collections, or browse by architectural house style. Modify any house plan. Ready to start? Our website is easy to use and we are here to help you find your ideal home design.
Deck Design is Straightforward. No advanced carpentry skills or sophisticated tools are needed. If you can hammer a nail, saw on a straight line, and read a level, then building a deck should present no major problems.What's more, the use of pressure-treated lumber helps assure that your project will be virtually maintenance-free and will provide enjoyment for decades to come. You won't even have to paint or stain the wood, unless you want to. Left unfinished, it weathers to a rustic gray.
Check out tips for Building a deck on your own home @ www.startremodeling.com
Tools you'll need: pencil, 12-inch straight edge, 4-inch putty knife, utility knife, sandpaper, small bucket of drywall mud, piece of drywall (at least six inches larger than the hole), paint.First - measure the diameter of your hole to be repaired. From your extra piece of drywall, cut a square, four inches larger than the hole. Place the square face down on a table and draw a line two inches from the edge on all four sides. Score the drawn lines with your razor blade and break-off the excess drywall, leaving the front paper in tact. Place the drywall patch over the hole in the wall and use your pencil to outline the square on the wall. Cut the traced square from the wall. Apply a light coat of drywall mud around the edges of the newly cut square hole and place the patch into the wall. Squeeze out excess drywall mud with your putty knife and let dry overnight. Re-putty the patched area, again allowing the mud to dry overnight. Sand away excess mud and smooth out the wall. Paint the area and you're done.
Most plumbing problems occur at or near such fixtures as sinks, tubs, and toilets. Sometimes, however, the pipes themselves are the root of the problem. Pipes can be temperamental -- they can leak, sweat, freeze, or make loud noises. In the following article, we'll tell you how to deal with all of these difficulties. We'll begin in this section by addressing leaking, sweating, and frozen pipes.Leaks in Pipes
A Guide toPipe ProblemsWhether it's all sorts of strange noises or annoying leaks, there are many reasons why pipes may be posing problems.There are all kinds of plumbing leaks. Some can flood your home, while others are not nearly so damaging. Your approach to stopping a leak depends on the type of leak it is. If the leak is at a joint, tighten the joint. If the leak is in a pipe, remove the section that is leaking and replace it with a new section. Unfortunately, this is more easily said than done. For example, when you turn a threaded galvanized steel pipe to unscrew it from its fitting at one end, you tighten the pipe into its fitting at the other end. With copper pipe, the new section must be sweat-soldered in place. Most pipe replacement jobs are best left to a plumber, but, as a do-it-yourselfer, you may consider an alternative: the pipe patch.You'll find patch kits for plumbing leaks at the hardware store, or you can make your own with a piece of heavy rubber from an old inner tube and a C-clamp. Another possibility is to use a hose clamp with a rubber patch. Factory-made kits contain a rubber pad that goes over the hole in the pipe and metal plates that compress the rubber pad over the hole. A quick and easy way to stop a leak, the patch kit can even be used on a permanent basis if the pipe is otherwise sound.
Check out how to Howstuffworks for more
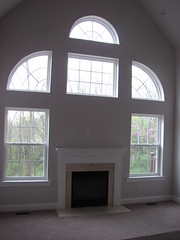
Deciding whether or not a window would look great on that empty wall? Do it yourself and save big money! Once you have determined the exact wall placement, size and shape for your new window, shop around for a unit that is of the same brand or a close match to your existing windows. Aesthetically, the appearance of the installed window looks nicer if it matches the existing windows on the home. Once purchased, determine the rough opening size. Most manufacturers list the rough opening of the unit in the literature provided. This measurement is typically a 1/2 inch larger on all sides of the unit. Measure the wall and, with a pencil, mark the rough opening size for each side of the unit. Determine stud location on the outer sides of the unit. In most cases, studs are 16 inch on center. Trace a level line from floor to ceiling on the center of each stud. The baseboard trim should be removed safely at this time and stored away for re installation later. Remove the drywall by using a utility knife and cut along the ceiling and each stud. Your opening is now considerably larger than the rough opening, however, the stud will act as a nailer to accommodate both new and existing drywall. All exterior walls are load bearing and require support above the unit to carry a second floor load or roof load, this support is generally called a header. The width of the unit would determine the size of the header needed to carry the load. In most cases for units less than 5 ft. a double 2x10 header would be sufficient. Using a circular saw, cut the 2x10's and a 2x6 (or 2x4 depending on the width of your exterior wall) 6 inches larger than the rough opening. The 2x6 will be nailed below the 2x10's and is a called a pack down. Using 12d penny nails secure a 2x6 stud 3" wider on both sides of the rough opening. Remove the 2 studs remaining in the center of the opening and secure the two 2x10's to the top plate. Install the packdown and measure for jacks which will support the header and butt to the packdown. A jack typically measures 81 3/4" from bottom plate to packdown. Install two jacks on both sides under the packdown on both studs using 12d penny nails. Your width is now established. Next measure from the pack down towards the sub floor and mark the rough opening for the height of the window. Measure down an additional 1-1/2 inches to accommodate the window sill. The distance remaining is the measurement in which you will cut the cripples. The cripples are the 2x6's which support the sill. Cut the 4 2x6's for the cripples and install 1 on each and the other 2 on the 16 inch stud layout. Next cut the sill(2x6) the measurement of your rough opening width and install to the cripples using 12d penny nails.
The window opening is now created. Stay tuned for removing the exterior and installing the new window.
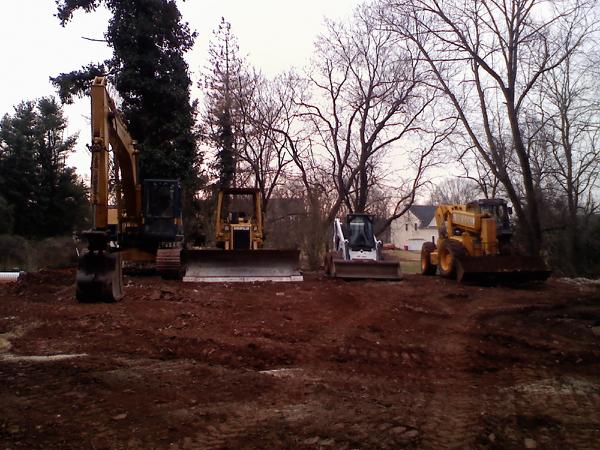
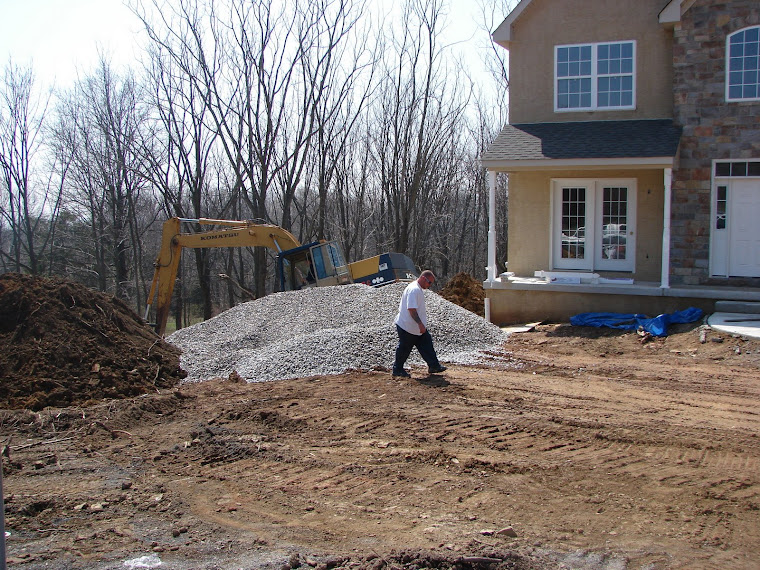
Many home buyers decide to build their own home on a vacant lot and purchase a lot to find that a house cannot be built, or their dream house plans are not suitable for the lot. Before buying a lot you should make sure that it is an approved lot by the local municipality, and that not only are sewer and water available for the lot but there is enough capacity on the lines to service the lot. If public utilities are not available, make sure that the lot has had soil tests and the lot shows adequate percolation results to accommodate an on lot sewage system. The on lot system should be in a location on the lot that meets the needs for your house placement and any future on lot amenities such as pools, decks ,landscaping and other future outdoor projects. Also, you need to consult a well driller for the depth of wells in the area. Well depths can range from 80 ft. to upwards of a 1,000 ft. and in some circumstances water may not be found. Most importantly make sure that you are aware of the local zoning requirements and that the building set backs for the lot fit the house of your dreams. All of these concerns should be known prior to purchasing the lot. Some common hidden or unexpected costs are, but not limited to; on lot storm water management, depth of well, grading plans required by the local municipalities, as-built plans required by the local municipalities, local sewer and water connection fees, home owners association fees, and taxes.